TPT Seller Challenge: Dare to Dream


Ever wonder why and what motivates TPT sellers & bloggers?

This week's challenge really touches our lives behind the scenes!

First up....TpT provides supplementary income to my family.  NONE of us are making the big bucks as teacher, nor did we ever expect to!  But it can be tough!  For my family, we've reached the time in our lives where we have not one but TWO kids in college!  That's what pushed me to do more than just create for myself, but I wanted to see if others would want it, too!  How awesome would it be to put in a bit of extra time to make my classroom stuff TpT worthy and help my family.  College is SO expensive now, and the hubs and I have REALLY worked hard to see that our kids exit school with no debt.  That takes a lot of sacrificing and the kids really have no $$ for extras.  My TpT income really helps with some of the extras without US living off of box mac & cheese 24/7!  I'd just like to do MORE!!  It would ease the pressure that the hubs bears most of, if he could count on just a tad more!  

Next up....learning and growing in the TpT/blogger community has been an area that I really want to grow!  I am so inspired by these amazing ladies..and a some men, too... that you can't help but want to surround yourself with people that make you want to be a better teacher!  Inspire you to be positive when the harsh realities of teaching can be so taxing.  Rising above that takes effort--finding more and more folks to support my creative side brings a much needed balance.

Finally...
I.Want.A.Laptop.Of.My.Own.
Totally frivolous, I know, but I do most of my work using a desktop.  It's a Mac...so awesomeness there, for sure!!!  But I want to be more mobile.  I have not been frivolous with any of my income, and I'd love to just say...Hey...I EARNED this!  Moms just don't roll like that though!  My kids always come first!  I just know that I could be more efficient with my time, if I were tied to a desk.

That's it for me this week!  I don't think my dreams are BIG by any stretch!  I tend to set attainable goals...and Darn it...I think I can DO it!


1

Classroom Decor & Interactive Notebook Must Haves


Hi friends...old & new!  Thanks for stopping in!

I'm super excited to be sharing not one...but TWO different items to inspire your Summer Stock-Up!  

One of my favorite categories is create for myself and for others are my series of Editable Labels, Deskplates & Banners.

I don't know about you, but when if comes to personalizing my classroom....I want OPTIONS!  I want multi-use.  I want to PRINT, LAMINATE, and GO.  So, I've created this series in hopes that those like myself can choose a color or theme they like & have a resource to turn to all year.

The sizes and the number of options inside each set is a bit different--based on the needs of who I created the sets FOR, however, there are some common elements that I think are vital and in each set.

All of the sets come with:

Banners in two sizes...ready to insert your letters in your favorite font.  Print...laminate...and go!
--The landscape fits 2-3 of the pieces to a page
--The portrait fits one piece per page
This is a snapshot of my own classroom while I was setting up for Back to School.
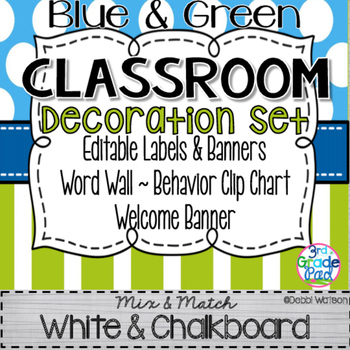
I use the Blue & Green set in my room.
I also have used the other style of banner for my "I Can" wall and my "Daily 5" wall.  You can grab this one in my store for FREE, too!  Click HERE to grab it anytime!
I use this style of banner strung together with a thin ribbon.
Add decorative ribbon on each end.  Pin to the wall.  Done!

Labels
In the Landscape folder, you have these choices that fit on one page:
  • 2 Large Deskplates  Some of my newer sets also include lined Deskplates that are Print & Go: Ready to manually your students names in your preferred writing model.
  • 4 Task Card sized labels
In the Portrait folder, you have these choices that fit on one page:
  • 4 Smaller Deskplates
  • 8 Small Task Card sized label
All of these labels come to you ready to insert a text box, choose your favorite font & color, and type the label.  These labels have limitless choices!
These large task card labels are perfect for my large library bins to create JUST the genre titles I need!
No wasted ink using labels that don't work for me.
Chalkboard & White Centers
I like having lots of options while keeping my look cohesive.  Having the choice between white centered labels and banners provides the look I want at any given time.  


The look of the same label really changes when you add the chalkboard center, doesn't it?  Pick and choose when you want that look and when you don't.  No need to buy two different sets.  It's included!

Cute Clips/ No Clips Options
There are times when I want my theme to show in my decor and times when I don't.  All of my labels come with and without clips on the side.  
You choose!

Get a closer look by looking at my previews at each of my products be clicking HERE!
All are 20% off!


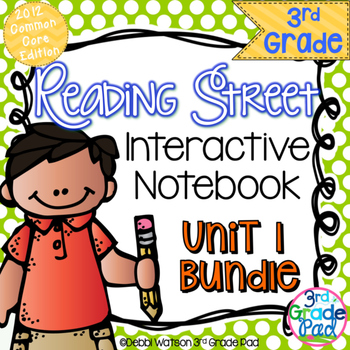
There are a lot of interactive notebooks out there.  I have a love affair with them!  Finding just what I needed to support our reading program was a struggle.  So, what I have created is once again based on what I needed and shared if there were those of similar needs.  These have become my best setting items in my store...which is so humbling considering I really thought I had a very narrow audience.  How wrong I was!  In a nutshell... I"m sharing....
I am a bit biased but these Interactive Notebooks have saved me!  I just love them!  So, if you use Reading Street in THIRD or FOURTH grade, let me share how this beauties can add a wonderful learning routine on a weekly basis.

Three Pages for Each Week
Each week includes:
  • A Full page for the weekly Selection Vocabulary
  • A Full page  includes 2 Half-Pages of the weekly Comprehension Skill
  • A Full page includes 2 Half-Pages of the weekly Vocabulary Skill
Notice I wrote...HALF Pages
Yes, this paper saving resource cut your paper usage in half.  We are on a tight copy limit as well as paper usage, so I am print conscious.  These have helped tremendously!


I really prefer using composition notebooks, so this smaller size will fit either a spiral notebook OR composition notebooks.

The Selection Vocabulary pages fit nicely on a two page spread.  Perfect for independent work while you meet with your small groups.  Definitions can go on the outside while the inside expectations can vary from group-to-group or week-to-week.  Meaningful sentences, illustrations, synonyms, antonyms, etc.  You are the teacher!  Make it your own!

  
I'd love for you to see the previews in my store to see all the pieces you will get!
Or click HERE to go there now!  All sets are 20% off!

UPDATE! 9/12/15
After so many requests, I've bundled my 4th Grade INBs as a growing bundle! click on the image below and see it in my store!


That's it for me!  Now click below to see more!!


0

Tech Tip for Transferring Digital Photos

Filling your phone with classroom pictures and get the dreaded pop up that you have no space??  Delete no more!  

Now that most of you are home for the summer, I’ve got an organizing tip for you!
Transfer digital photos from your iPhone or iPad with ease using this simple app!  No cords needed! Technology just got easier!
Raise your hand if you take tons of pictures at school?

I know I do!  I take pictures to help me remember anchor charts, my kids in-action to share with parentsmemories of special days or cute moments from my kids, and OF COURSE for my blog.  And I  just BET you've got many still sitting there.  

Maybe you aren’t a picture hoarder like I am, but it is rough trying to get these precious pictures you want to keep from your IPhone or IPad to your computer.  I’ve messaged them to myself. I’ve emailed them to myself. Every way I have tried is so time consuming that I end up NOT doing anything with most of them.  They just sit there.  

Until this happened.
 
This made things more serious and the need for a SERIOUS search for how to rectify this issue!  

Solution Found:

This app is amazingly simple, quick and FREE!!  Well, free if you want to transfer within the first 50 pictures.  But it makes more sense to download them in sections ANYWAY!  You'll see why in a bit

After you  have created your account and open the app, you will see this prompt
You will need to enter the URL into your desktop.  Once you do, you will a see a screen like this.  I'm going to choose my Camera Roll.

Your IPhone/Ipad will even let you know that you're connected. 

Once you click the folder you need on your IPhone/IPad, you will get to this screen.


Next, just click on the picture you want, click download, and they will be sent in a Zip File to your computer.
I like to immediately rename the file, because it ALWAYS names the file "Camera Roll."  Pretty easy to get them confused if you do this a bunch!
Now...all you need to do is decide where you want to store them on your computer!

Remember when I mentioned downloading your pictures in groups?  I will click on several that "belong together" and download them.  Then do another "group", etc.  Once I've done that...I rename each group at once.  So if they are SCHOOL related, I put them in that folder.  If they are BLOG related, PERSONAL, etc....I put them where it makes the most sense like you see below.  


Okay...now who's going to take pictures the first day of school now???  I am now that I have an efficient way to get them OFF my phone!!!  I can FINALLY do one of those "3rd Day of 3rd Grade" cutesy frames!  Yay!

Happy picture hoarding!  Hee hee!


0

Task Card Organization Tip


Hello y’all!!

I will be changing classroom this fall and sadly, my new room was not ready when we exited for the summer.  What’s a teacher to do with SO much stuff and want to start the new room FRESH and ORGANIZED?

If you are like me..you just take the mess home. 


First on the agenda is to deal with my task cards.  I have a love/hate relationship with them.  I love GETTING them.  I love CREATING them.  I love USING them.  What I have yet to love is how I MANAGE them. And by MANAGE...I mean STORAGE.
.


I have quite a few things I really like and have worked for me.I picked up loads of accordion folders at the Target Dollar Spot-often times on SALE!  They work GREAT to tape the cover on the outside while keeping the contents inside.  The rigid index card holders are perfect, too.  Photo albums from the Dollar Tree will hold not one but TWO sets of task cards.  Awesome!  Perfect for Word Work-no worries of them getting out of order or lost cards.


While I still intend to use these when they are assigned, they didn’t work well in my storage bins.  It ended up being a hodge podge, didn’t fit well, and it was hard to find what I needed.  I’d have to ask myself what did I store it in last?  Wellfor someone who forgets why they went upstairsthat just wasn’t going to work for me long term.

So, I brought in the pile of task cards and bins into the living room and set to work!


Once I decided on the categories, I removed all of the various containers and replaced them with……

BINDER CLIPS.

Yesthose ugly clips that seem to sit in my closet unused.  But.I have a plan for them and they will be the answer to my organizational needs.

Without doing anything extra, I like that I can easily just flip through them so easily!!


I purchased a package of circle labels in three colors to help me code them.

Green stickers-2nd Grade
Pink stickers- 3rd Grade
Orange stickers- 4th Grade

I am labeling the top of the clip with the appropriate grade level so that I’ll know right off the grade level I need: whether it's  for remediation, on-level, or enrichment.  If there is a CCSS that I can label it, I am writing the standard on the sticker!


As you can see, I’ve given myself a little reminder in the back to make sure I don’t FORGET my new system! 

Since the INSIDE got a facelift, I created new labels for the OUTSIDE!


This was a great project that will keep by busy for a few days.  Once I started labeling, I found that I had to pull off some of the stickers to make room for two.

I'll be back soon with PART TWO!  Here's a little hint.... you can't have task cards without answer sheets and answer keys!

See you soon!

2

TPT Challenge: Makeover Madness

I am so excited to be participating in a fun challenge for TPTers!  If you're not a TPTer, I hope you'll follow along anyway.  I am SUCH an advocate for teachers sharing and selling their ideas on TPT.  I watched other great sellers for several years, taught myself how to do things, and found a very satisfying hobby.  It is a creative outlet that really fills in those gaps right now.  I never thought in a million years that I would sell anything, need to know about marketing, or need business cards.  I most CERTAINLY never thought I would meet online strangers and have a community to support each other like I have through blogging and selling TPT.

That said...here I go with Week One.  Keep in mind that I am still pretty much a baby blogger and a baby TPTer.  Still in this short time, I have evolved in my style and taste--much like if you look in your closet.  You pull out a shirt and ask yourself..What was I thinking when I bought THAT??  The same goes for when I cruise through my store.  I see a cover and think similar thoughts!  What was I thinking when I put those colors together?

I have done a bit of redoing some covers this spring when I wasn't feeling very inspired to create new products, but I wanted to create some new life to some products that I PERSONALLY liked but didn't get much traffic.

Here is a prime example:
Well, I had the cute chevron thing going here.  I had purchased a few KG fonts by this time, too.  With a fresh eye though....the game title is clear enough, but you'd have to read the product description to really know what it covers.  The Melonheadz cutie is sweet enough, but she is just....there.


While the game title still takes center stage, the buyer knows that tricky multiplication facts are the skill.  Your entire piece of clipart does not have to be placed on the project.  Peeking in and going off the page makes the product POP more and really shows the artistry of the clipart.  I was OVER using glow.  That is just SO last season.  LOL!  I know that I over did the glow.  Substituting a black background has a much better effect in getting your titles to POP.  In my opinion.


These Before/After pictures are part of a complete bundle that I updated this spring adding BLACK & WHITE versions to the original.  Many buyers are ink conscious.  Providing an added option pleases everyone, in the end.  I try to let the buyer know on the COVER that Color & Ink-friendly Versions are included in one set.

If you are interested in these, I've marked them by 25% for this week only!

Click HERE for Tricky Multiplication I Have, Who Has

Click HERE for my Spring ELA Task Card Bundle

Yay me!  I've blogged TWICE today and BOTH have to do with make-overs.  Kinda spooky!
Can't wait until next week for a new challenge.  I"m heading out now to see if I can some NEW fresh ways to look at my other products that need updating this summer!


8

DIY Mason Jar Desktop Storage


Hello friends!


Cannot BELIEVE that this is my first edition of Monday Made It over at 4th Grade Frolics this summer!  I’ve been a busy beejust haven’t BLOGGED about it!  Sohere ya go!


Notice anything NEW as you look around?? Yep!  My blog has gotten a makeover!  I think it turned out AMAZING!  It has all the colors I love, has a cute frogbut not “too” froggy, and it just makes me smile.  Kristen at Chalk & Apples was my designer!  I chose her because I liked that all of the blogs she designed were different.  There are some beautifully designed blogs out there that I also love, but the style is one I recognize pretty quickly.  I think Kristen puts a touch of herself in the design but also reflects the personality of the blogger.  And guess what???  Within days of completion, I actually got to MEET her at the Nashville Teacher Bash!


Isn’t she a cutie??  If you’re a blogger, I highly recommend working with her!  Affordable yet AMAZING!  If you do...please tell her I sent you!  I'm certain I was a pain in the rear at times!  I really want her to know how awesome she was to work with!
It is my goal this summer to do something about separating my work time from my personal time.  So, I want to create a better workspace in our OTHER living room to call my own.  I love working on my laptop in the living room while we watch tv and stuff, but I’m starting to feel like my family only sees my profile!  Need to get my work time more separate from my personal.  Might keep me off of social media while I’m working, too! Maybe..

This “Made It” has my sweet daughter ALL in it!  She helped me pick out this cute organizer.  Right now it holds my future EC Teacher Planner, my EC Life Planner, and a few other odds and ends. 


I needed something to hold my pens and such.  I really loved these cute mason jar holders that she puts her make-up brushes in.  Turns out, she helped make tons of these for recruitment last year!  So, I’ve chronicled how SHE made them for ME. 

I bought these jars in the craft section at Walmart.  No need to buy a DOZEN of them!  Although, I guess you could for a party or something.  She insisted that I buy the cheapest white spray paint. 98¢ DONE!

Step 1: Stick hand in the jar and randomly spray all around lightly.  Yesshe stuck her hand in there!  I’m running around sayinglet me get you a glove!  Love that she didn’t care and just did it.  She put absolutely no precision into the spraying and remarked that when her buddy sprayed hers..she made weird streaks by trying to make it even.  Yes, that would be me! 


Step 2:  Let dry for a bit.  

While they were drying, she DID wash her hands to get the paint off.  I gave her a Magic Eraser to help the process and it ALL came off!  Gloves would have worked, too, but whatever.  I'm just a Mom.  LOL!


Step 3:  While it is still a bit tacky (about 20 minutes later), she took some sandpaper and lightly sanded over the bumpy areas and some random spots along the edges. Loved watching as she eyed where she thought it needed the look of being worn.  That’s why she’s the artist, and I’m not!  Anyone else belong to Over-Thinkers Anonymous?


Step 4: After I let it dry for a while longer, I wrapped some jute that we bought in the Dollar Spot at Target around the top.  Tied a knot.  Done!

I think it turned out so CUTE!  I think I might go back and get one more that's shorter and swap one out.  That way I can see all of my Frixion Erasable pens easier and grab the one I want!


So, my desktop is a bit better now.  I need a better chair.  Need to get artwork for the wall.  Maybe this week I’ll head to Home Goods or TJ!  I'm sure my girl will take the lead in this part, too. 


I really wanted to create something for my classroom that builds Vocabulary in Writing.  I looked through the standards for 2nd & 3rd grade for something that seems to be missing in our curriculum.  Something that seems to be skimmed over.  Then I saw the standard for Collective Nouns.  Hmmmmwhat the heck is that?  Who else has that thought with some of the standards?  So, I googled it.  Pondered it.  This is isn’t a standard that you can teach in a week.  It is one of those things that you know someand some you don’t.  Since a crash course isn’t going to benefit the student, I thought it might be interesting to have a small area dedicated in my room that would be ongoing. 

My idea:  Create a flip-type chart that I can either change weekly or daily that is ready to go.  Spend perhaps 2-3 minutestops.  Flip through the old pages and introduce a new one.

Enter:  Daily Collective Nouns Display. 


I really want to use one of my Dollar spot pocket charts for this, but.Alas.they are all at school.  For the purposes of taking pictures, I placed the pieces on a chart tablet I have at home.

I'll create a skinny area.  At the top will be the Title and definition.  Then I will put in my pocket chart. Slip in the "A Group of" title.  Then I'll leave space for the weekly noun.

I created a few different choices of bright colors for my Group strips so I can switch them out as I see fit.  


Under the pocket chart, I'll add two hooks into my bulletin board.  I've put together a set of rings and pocket protectors to hang each of the collective noun posters that I've created.

In my mind, when the week or day is over, simply slip the noun card inside the pocket protector and flip the page.
Now....I'm ready to just pull out and place the next noun card and display the matching collective noun.


So that my students can be involved, and I can assess their understanding of the collective nouns, I created some Exit Slips for a daily/weekly formative assessment.  If I can get them to write it--I'm hoping they will use it in their speaking and writing, too!  Linking the connection between the singular, plural and collective noun will open doors to any misconceptions there, also.  

If you think this might work for you, I've put it in my store.  Right now I am up to 22 collective nouns.  As I add clipart or other collective nouns I want to use, I will add them.  
Click HERE to see it in  my store for half the price until Tuesday @ 6pm CST!


So, that's it for me this week!  I think this girl needs to sit back and drink her coffee before I start on my next project!


12