

Summer is here! And time to kick off the first weekly Monday Made It!


My first and biggest MMI has been a very long project. In fact, it's been in the works for 13 years. Yep, my baby boy graduated from high school! I'm so proud of his accomplishment, and the future he holds in his hands. So much fear in sending your child off to college--are they ready, should they stay home the first year. These are all things I can't know, but I do know that our successes and failures happen for a reason. I wish him well in the fall when he ventures across the state line to attend Mississippi State University


.JPG)
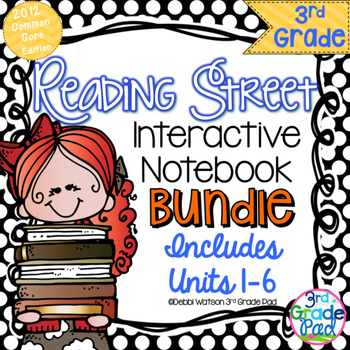
Now that you have 100 blank pages, with all the skills and such to fill them, how do you keep it all organized? I've given this a lot of thought, and here is my plan for next school year. Reading Street is broken up into 6 units with 5 weeks embedded in each one. I've decided that I will focus on 2 skills a week and the Selection Vocabulary OR Amazing Words. I'm still up in the air about this, so for blogging purposes, I'm including the selection vocab.
First, the kids will need to set up the Table of Contents.
.JPG)
I used the red guidelines as the natural dividers for the sections. I have "Unit", "Table of Contents", "Pg". So, for Unit 1 Week 1, they will label "1.1" and a line for whatever skills to be covered. Of course, these skills would be introduced on different days, but you can see how it will be referenced.
Next, skip over three pages (planning a page front to back for the 6 units)
.JPG)
I always have my kids cut the "perimeters" first before we ever get going in our Math INB. Perfect time to introduce this word to their Academic Vocabulary. All the cutting and chit chat will get out of their system, and we can focus on the task at hand all at once. I know some shy away from INBs for this reason. Trust me, if you establish a routine, it goes quickly and they start to anticipate what to do.
The biggest hurdle is getting them to only glue the strip and not the WHOLE page! Having a finished product displayed on your Elmo helps. That said, once you train them to the procedure, it will go super quick. Cut the flaps once it is glued down will help keep the paper more manageable. If you cut the flaps THEN glue, it's harder to glue the strip down straight.
.JPG)
.JPG)
Sorry this is sideways- I guess my camera didn't flip with me. But as you can see, you are ready to record. You have 2 places to record, it is really up to you. We will likely define the terms to go with the text book on one side. Then on the lined parts, students will need to find examples from their reading. In this case, it could be the literature from Unit 1 Week 1, and I would expect that when we revisit this skill, they can cite from their own reading. Or you may differentiate how you approach this and do as your small group lesson.
I set up the Vocabulary Skill Page a little differently because of the skill.
.JPG)
Gluing happens in the middle strip.
.JPG)
We will likely do examples as part of the whole group or small group lesson. The INB part might be done together or part of the Word Work assignment. My example shows the homonym in the center and an illustration on the outside.
.JPG)

To set up the Selection Vocabulary/Amazing Words section, flip to the VERY middle of the book to start the vocabulary section. We will use both sides each week in a two-page spread.
.JPG)
.jpg)
We used to do a version of this on a single sheet of paper each week. Folded, quartered, and using one box for each word. It was very meaningful, but what to do with it after the week is over? I had trouble saving and filing them, so this was a great solution. I use this for Word Work each week, too. Definition on the front, illustration and sentence on the inside. As the year progresses, we add synonyms and antonyms. Finding synonyms/antonyms for these words is SUCH a challenge sometimes, but it becomes a puzzle once they know that some words don't have clear cut choices to be found in the dictionary. I really need them to think deeper about vocabulary!
.JPG)
So, using only 2 full sheets a week for the INBs (one for the vocabulary and half each for the other skills), I have three meaningful activities as part of our routine. Minimal prep-Maximum impact.


I love making and USING task cards with my kids. They are a great way to check for understanding at the beginning of a topic and for assessments, too. I've chosen 12 homonyms that are used twice. On the answer document, the students choose either "A" or "B".

That part is pretty sample, but the kids need to choose a word or phrase that was the clue to help them choose. Citing words from the text and finding context clues is an important skill.

1/2
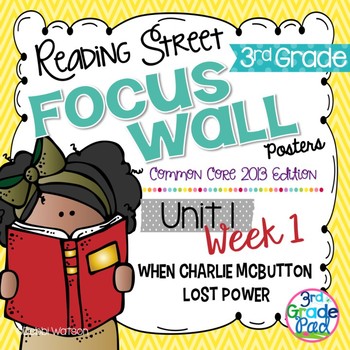
I say HALF because I'm not quite done, but I am pretty excited about updating my Reading Focus Wall this summer. I've put together a collection of posters for the first week of Unit 1 and plan to make them for the YEAR! Hope to stay focused on that one! Here's a sneak peak!

I haven't quite decided if I want to bundle them as Reading Street or as Skill and Strategy posters. My Interactive Notebook Pages will be available then, too! If you'll follow my store on TpT, you'll see them as soon as they are up though!!
That's me for this week! I even spent some time at the pool! But laundry......... that's another matter!
Hope you'll check back on Thursday each week this summer and read all the responses from The Primary Gal's book Study of Guided Math! I'm half-way thru the chapter 2 prepping for my blog post.

Hope y'all have a great week!
Debbi


You've been busy! I need to figure out what I want to do with my reading response notebooks next year...I'm getting 12 Chromebooks so I want to do a lot digitally if I can! Way to go on being so organized!
ReplyDeleteThanks! Our school has a Reading Log to write responses to their books now, so that is sort of off my plate now. It's a great system. 300 pages (or 3 books) from the same genre-they earn a dog tag. Our Rdg Coach and Media Specialist supervise it. It has really encouraged reading across the genres and not one series. Thanks for stopping by!
DeleteI love your interactive notebooks. I tried them last year, but really never went anywhere with them. It took about an hour just to cut the pieces! I love your way of explaining it and having them cut after they glue. I might give it another try this year.
ReplyDeleteThis was my best year yet, Kelly. TpT was a life saver for me. Blair Turner has some great ones-I just can't use them all or we'd never do anything else! LOL I'd love to hear about it if you try again!
DeleteI love your notebooks. I never used these successfully, as a third grade teacher, but your hints about starting from the beginning of the year and making it routine are good suggestions. I am now a STEM lab teacher and I'm really thinking about how to use notebooks better next year. Thanks for sharing!
ReplyDeleteCarol (also from Alabama)
Teachers Are Terrific!
I love your notebooks! I tried these in Math with my third grade class, but never successfully. Your hints about making it routine are great! I am now a STEM lab teacher and I am trying to figure out how to use notebooks with my lab students!
ReplyDeleteThanks for sharing!
Carol (also from Alabama)
Teachers Are Terrific!
What a cool position, Carol! We are getting a STEAM lab this year. It has an Art component. Sound interesting!
DeleteHope you can find a way to use INBs with your lab. Seems like a good record of learning there, too.
I love an interactive notebook! I totally agree that adding in foldables and letting them cut and glue makes their day so much more exciting, haha! Congratulations to your son! ~Heather
ReplyDeleteLoose Shoelaces
Thanks, Heather! It's an exciting time!
ReplyDeleteGlad I'm not the only one who enjoys INBs!
Woah! You have been busy Girly!!! I love, love, love the interactive notebooks pieces! It's definitely a goal of to incorporate more of that next year.
ReplyDeleteErin
Short and Sassy Teacher
My district just adopted Reading Street for this coming year. Lots to learn before August! I'm a 4th grade ESL teacher so I'm super bummed I can't use your interactive notebook as is-- it looks fantastic for 3rd grade!
ReplyDeleteI pinned your post so I can set up notebooks in a similar way. I haven't done interactive notebooks ever before but last year my groups all constantly referred back to their notebooks so I want to try it this year.
My Bright Blue House
This comment has been removed by a blog administrator.
ReplyDeleteThis comment has been removed by a blog administrator.
ReplyDelete