Showing posts with label Task Cards. Show all posts

Simple Center Organization


Livening up my guided math rotations each month are NEVER a struggle during the holidays!  I like to keep about 10 center choices each month and save about FIVE of them for something seasonal and out of the ordinary.  Here is some fun tips for storing those seasonal choices to make some of your OLD centers NEW again!

I love using this Sterlite Photo container to organize 5-6 sets of task cards.  I will switch these out monthly, but my students are familiar with the location and procedure that remains the same.  The bins takes up such a small space that it is perfect if you have space limitations.


These are especially ideal if you wave centers with smaller pieces.  I know that they will not be lost or fall out of a basket if I have them contained in these nifty plastic containers! This set shown is from my December Math Mini Center Bundle for 2nd Grade

I also love grabbing any seasonal gift bag and throwing in a few centers or sets of task cards.  Games are somehow "cooler" in a bag!  Simply adding a unique touch adds some pizzazz during my guided math rotations!

Another advantage to using gift bags is that you can decide if you want the center to be a seatwork activity of a partner activity is a selected space in the room!  It is a great way to self-contain the activity.

How do you jazz up your centers?  Leave a comment!  I'd love to try something new!


0

Classroom Tip for Managing Centers


Hi friends!  So excited to join in The Elementary Entourage’s Annual Tricks & Treats Blog Hop!

 Wanna see my trick from LAST year?  Be sure to click HERE!  I shared how I use Symbaloo in my 1:1 Digital classroom.
My tip is super quick and can be used for ANY center that uses an answer sheet.


I love using centers that are completely open-ended, but I also like for my kidlets to be accountable at times.

Problem: One little Goober will forget that he started a center.take ANOTHER sheetthen, right in the middle of my small group lesson, little Susie can’t do the center because there are no more sheets.

Happens.ALL.The.Time.

My solution is pretty simple.  All you need is:
  • ·      Seasonal stamp or sticker
  • ·      Sharpie


Create a set of answer sheets for every child in your classroom.  Then, put a cute little stamp or sticker in the corner.  You can change it seasonally or to help you differentiate your kidlets!


 Once they are stamped, I number the pages.  This corresponds for the number system I use for all of my kids.  We line up in order, I use a number system to file their weekly papers.  


Yes....keep going until you have enough for every child to complete the center ONCE.  

This cute center in not mine!  This one dates way back and was a free download.  I did a little searching and the author happens to be a fellow blogger.  Be sure to check out Confessions of a Teaching Junkie to see more of her recent stuff!  

Then, you will simply fill your folder, envelope or wherever you store your answer sheets with your center.  Now...all you kids need to do is...
  • Choose THEIR number
  • Work on their center
Not finished? No problem!  Have them return their paper to their spot for NEXT time!  This is super quick to prep--you can even let your sweet friends get these prepped for you!


Now that I’ve tricked you.how about a TREAT!!!

I’ve put together a little Sample to use in your centers this October.  Super easy to use for a small group lesson, center, or RTI for the standard!


I’ve also put all of my Halloween Task Cards on sale until Monday, October 19thrd.  Once midnight hits..POOF!..it’ll be regular price!  Click the image below to see my FREE sample and these items that are all 20% off for this short time!


Now...hop one over to see more great Tricks & Treats!


0

Task Card Organization Tip


Hello y’all!!

I will be changing classroom this fall and sadly, my new room was not ready when we exited for the summer.  What’s a teacher to do with SO much stuff and want to start the new room FRESH and ORGANIZED?

If you are like me..you just take the mess home. 


First on the agenda is to deal with my task cards.  I have a love/hate relationship with them.  I love GETTING them.  I love CREATING them.  I love USING them.  What I have yet to love is how I MANAGE them. And by MANAGE...I mean STORAGE.
.


I have quite a few things I really like and have worked for me.I picked up loads of accordion folders at the Target Dollar Spot-often times on SALE!  They work GREAT to tape the cover on the outside while keeping the contents inside.  The rigid index card holders are perfect, too.  Photo albums from the Dollar Tree will hold not one but TWO sets of task cards.  Awesome!  Perfect for Word Work-no worries of them getting out of order or lost cards.


While I still intend to use these when they are assigned, they didn’t work well in my storage bins.  It ended up being a hodge podge, didn’t fit well, and it was hard to find what I needed.  I’d have to ask myself what did I store it in last?  Wellfor someone who forgets why they went upstairsthat just wasn’t going to work for me long term.

So, I brought in the pile of task cards and bins into the living room and set to work!


Once I decided on the categories, I removed all of the various containers and replaced them with……

BINDER CLIPS.

Yesthose ugly clips that seem to sit in my closet unused.  But.I have a plan for them and they will be the answer to my organizational needs.

Without doing anything extra, I like that I can easily just flip through them so easily!!


I purchased a package of circle labels in three colors to help me code them.

Green stickers-2nd Grade
Pink stickers- 3rd Grade
Orange stickers- 4th Grade

I am labeling the top of the clip with the appropriate grade level so that I’ll know right off the grade level I need: whether it's  for remediation, on-level, or enrichment.  If there is a CCSS that I can label it, I am writing the standard on the sticker!


As you can see, I’ve given myself a little reminder in the back to make sure I don’t FORGET my new system! 

Since the INSIDE got a facelift, I created new labels for the OUTSIDE!


This was a great project that will keep by busy for a few days.  Once I started labeling, I found that I had to pull off some of the stickers to make room for two.

I'll be back soon with PART TWO!  Here's a little hint.... you can't have task cards without answer sheets and answer keys!

See you soon!

2

Quick & Easy Math Centers for December

Hello fellow Monday Made It fans! How I have MISSED you!!!!
This has been the school year BEYOND school years!  So little time for the extra "fun stuff" I enjoy.  We have switched to a Standards Based Report Card.  Ugh.......
It's not that I'm not a FAN mind you, I do like knowing a bit deeper how my kids are doing.  Truthfully, I do.   The paperwork, however, takes me back to when I taught Kindergarten to Pebbles & Bam Bam. Anyway....it'll get better....it always DOES because that's how teachers ROLL!


BA HA HA!
Just kidding......
Seriously, how many Mondays have you had this year when you were super glad to have your lunch made with a cup of coffee to go???  We gotta celebrate ALL the victories, right?

Seriously, I've been a pretty good TPT buyer this year, but I haven't had the time to make something special for my kids.  I just LOVED it last year when I would bring out some new game or task card set and they'd ask me...."Did you make this one?".  I don't bake or cook a lot, but I imagine this is the equivalent in my world.  "Home-made" games!!  With the holidays quickly approaching, I wanted to use my of my favorite tricks to organize my newest centers!


I wanted something super easy to put together, something that didn't take too much time to complete, but I knew would pack a punch in a short period of time!
I am so stinking excited to bring these out for the next two weeks!  It seriously was really quick, considering there were so many little activities.

I bought these cute little gift baggies for @ $4 for five of them.  I'm sure I could have gotten them cheaper at Dollar Tree, but I wasn't AT Dollar Tree when I needed them!  LOL!

After I laminated the pages with my little best friend, I taped a cover sheet to the bag.  Then, I just had to cut out three little pages...put them in the gift bag...and BAM!  Center is ready to go!

So, while I watched my Sunday night favorite, "Once Upon a Time, I had all the centers I wanted to use ready to go!  Just needed a few more bags...OR... I'll use 5 one week and 5 more the next week!
No picture (SORRY!), but I ran off a stapled bundle front to back of the answer documents so that they won't lose them, they're kept together, and can complete in ANY order!


Hope you like my tip for spicing up your December Centers!  
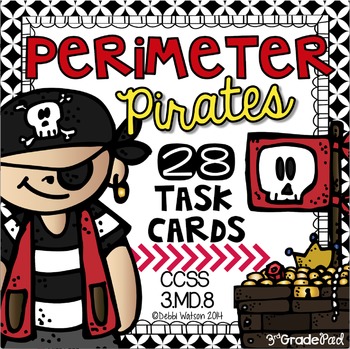
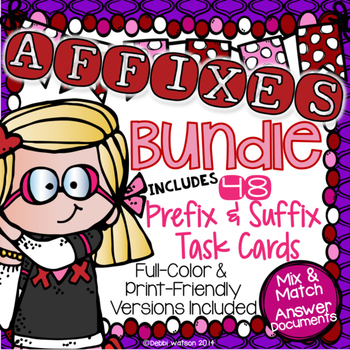
  1. Pull out the task cards you need to do a spiral review while you work in a small group to enrich and remediate.
  2. Put them in some cute gift bags
  3. Staple the answer sheets together
  4. Done!  Winner Winner Chicken Dinner!
My kids went NUTS when I brought them in last week and keep asking...WHEN CAN WE DO THE PRESENTS GAMES????

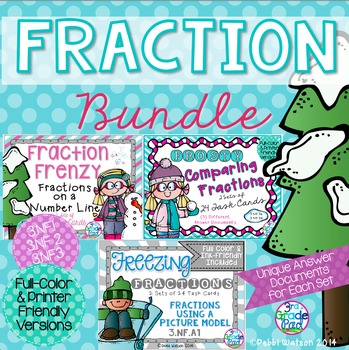
That's it for me!  If you're looking for some centers, click on the image to see these December Math Mini-Centers in my store.  I've got them marked down for a short time, if you need something fresh! 


Merry Christmas and Happy Holidays to you all!


1

Blue Green Focus Wall Pennant Idea

It's official!  Summer seems to have barely started and yet its winding down!  I'm in training this week for Project Lead the Way.  Anyone out there familiar with it?  We'll see!  I'll be the Master Teacher for grades 3-5 at our school, so I guess I better learn all about it, huh??  My mind will be on my classroom and this weeks wonderful Monday Made It posts for when I get home!
Thanks, as always, to sweet Tara for this wonderful sharing event!  Yet another week of no Made-Its for home.  I really should.......

We were allowed back in our classroom this week.  I was super excited to see that not only did they install the MUCH anticipated new touch Promethian boards, but they painted the wall behind it.  Imagine that!  A pop of color in my room!  And it's PERFECT for me!
I didn't actually MAKE this one, but I'm super excited about it!


I wanted to tackle those bulletin boards this week.  Something about having some cute stuff on the walls makes you feel like you're making progress....even when there is a freaking mess everywhere else!!

The bulletin board on the left is the same size as the only board I used to have up front, so I just recycled that same fabric.  I had Math on that side of the room last year, but I need more room for Math.  So.....Reading Focus Wall it is!

I really wanted to switch the style of my pennant banners and came up with this one.  Y'all......I'm in love!  It takes up less space, I'm still not having to make the letters even (since I put right up at the top), and I still get that POP that I want!  
I didn't get very far on my Math Focus Wall yet because I'm still rolling that large space around in my head.  My clean slate is ready to go though!  And LOOKS better than that cork!
My Facebook friends really LOVED my new banners, so I decided to add them to my Blue & Green Classroom Decoration Bundle......and to the smaller set of Editable Labels, Desk Plates & Banners.

If you HAVE it already....go back and download the updates in time for school!

Click on the picture of the product you have so you can get it!

Last but not least, I've been working on getting ahead and having some multiplication task cards ready once CRUNCH time happens pretty soon!  Hoping to front-load some things before we REALLY hit it hard!  I love all these little cowboy clips, so they became a set I can use anytime.
 I'm planning to blog more about them later, but I'll just share the covers for now.  I know you have a lot of pages to visit!   These three new additions are 20% off in interested!


That's it for me!  Have a great week, y'all!


5