Showing posts with label Freebie. Show all posts

Six Free & Easy Classroom Rewards

Hello friends!  I'm excited to share with you my FAVORITE classroom rewards and WHY I use them!

0

Pocket Chart Location Freebie


It's that time again, y'all!  Man!  It's been a busy week!  Amazing what you can do in a week in the SUMMER!  Linking up with Tara at 4th Grade Frolics once again!  If you are starting with me, be sure to click on her logo to head back and see all the FAB projects this week!
So, this isn't me!  But he is MINE!  My boy and I ventured off this week for his college orientation.  I'm proud of him for MAKING his first college schedule.  We found a great route from home to Starkeville and had chat time while we burned rubber.  Hoping "Bully" will take good care of my boy.

While cleaning out my craft room (lovingly referred to as the CRAP room by my family), I came across a pile of these that were never used.
Be honest...they are a $1 at Dollar Tree and Target's Dollar Spot.  You grab them while they are there, and usually grab more than you need.  So I decided I NEEDED to put one to use & I put together a  "Where Are We?" chart for outside the classroom door.  

Man, it was a breeze!  First, I measured the space so that my sessions would fit properly.  Forgot the old adage to measure twice...had to go back and redo the height.  :-(
The fun part was creating and using some fun papers!  I picked some great ones at SDL Designs a while back for .12 a set!  They look textured and weathered--like that thick, handmade paper.  I love them!  After designing it, I laminated, cut and slipped them in.

I haven't decided if I'll do it this way with the "Where Are We?" in the middle--and hiding an extra one behind another slot not used regularly.
Or....... just post the sign above the pocket chart and display them all!

I love my little clip to move up and down the sides to show where we are!

I put together ANOTHER set to go with a class theme I've been working on, too.  I think it turned out pretty fun, too!

I've set it up in my TpT store as a FREEBIE for you!  Hope you'll enjoy this pop of color to let your visitors know where you are!!  Click HERE to snatch it up for your classroom!


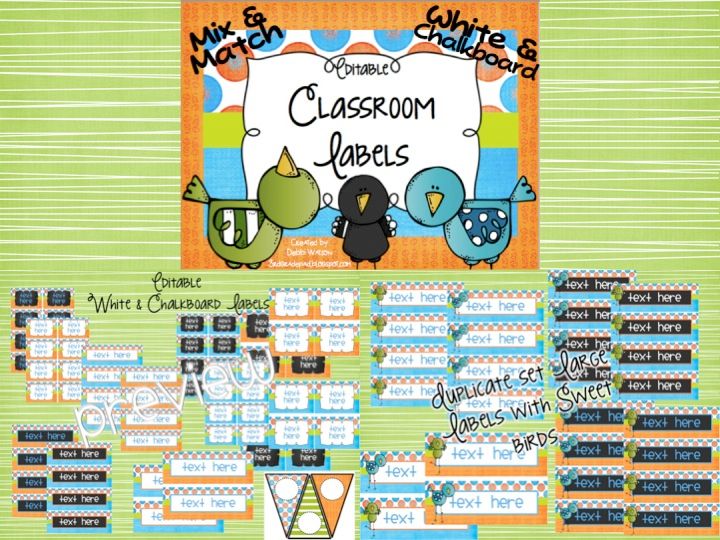
Finally finished a classroom set that I've put into my store.  I LOVE my blue and green set that I made for myself, but I just felt like I wanted pops of orange in a set.  I think all these fun and funky papers spoke to me when I was making some task cards, and I was inspired to do another one for my store.
My Facebook friends said they preferred things broken up into smaller sets to meet their budgets, so that is what I have done.  I will likely bundle it up in the next few days though!

Click picture to see in my store

I love these Editable Labels in both of my sets.  There are always so many things to be personalized that it's great to have a "Go-To" spot to fill in the blanks....Print...and ....GO!!!  I've added these cute and funky Melonheadz Birdies, too.  So, you can go plain or have a little Tweeter!  For me to make a set and NOT to use Froggies first...you know I was in Love!


Click picture to see in my store
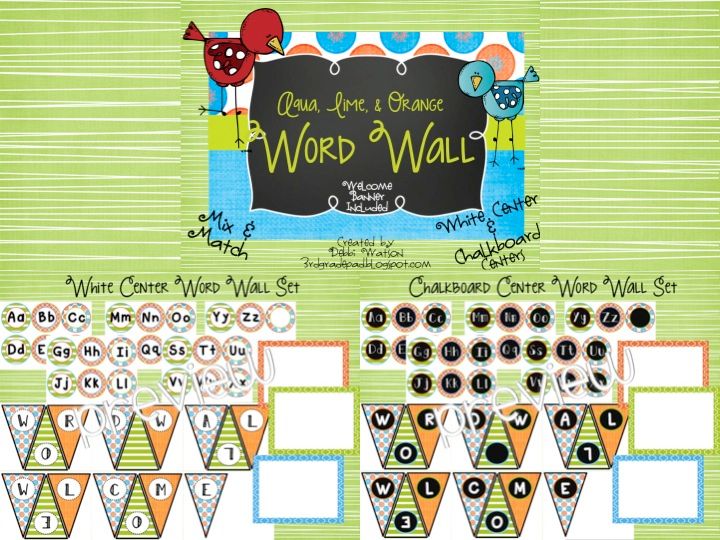
Here's the Word Wall set to match.  I've thrown in a Welcome Banner for you, too!  These textured papers have such a cool effect!  


My Classroom Schedule Cards have been a great resource for many, so I HAD to make another set to match!  There are two headers to choose from.  I"ve also added a Powerpoint slide to you can insert your own text if there's a subject that I left off!  I've used the Green & Gray in my room last year and plan to use them again.  I love that the kids refer to this throughout the day.

I also made a clip chart to display in your room.  I personally LOVE the Chalkboard effect in these....definitely planning to update my classroom with my blue & green version.

I'm itching to make another classroom set, so if you LIKE my blue & green and the aqua, lime and orange....but it doesn't work you...leave me a suggestion!  I'm prepping for my "empty nest" days to come!  (tears.....)

Have a great week y'all!  


12

DIY I Can Wall (+FREEBIE) and Classroom Decor

Hello everybody!  I know slowly but surely more of you are beginning your summer!  I'm so sad that mine will end in July!!!  How crazy is that??  Gotta use these precious days wisely, huh?  On to the good stuff, right?  Don't you just LOVE Mondays with Tara at 4th Grade Frolics??  Make sure if you are starting here with me, you head back over there to read all the great ideas!


But FIRST, I'm also meeting up with The Teaching Tribune for their Monday Meet Me.


Thought you might not mind a little Snippet to know more about me!  Be sure to click back over there to meet lots of your favorites and meet some new folks!


This isn't a NEW project, but I think it's a good one.  I've never blogged about it, so I'm sharing a super easy project that would be great to use in your classroom.  You've seen this picture and frames like it all over Pinterest.  I loved that you could use a dry erase marker on the glass----and wipe it off!  And there is only so much room we can take away from our white boards for permanent displays.  With the addition of Promethian Boards, even more space is taken away.
I really loved this idea and really wanted to use this idea for either a Homework board or something else.  I could never really find the frame that I liked, but I could easily find frames at the Dollar Tree.  So, that is what I did!  I also decided that I needed a permanent spot to display our I Can statements that we were required to to display.  Here's the end product!  If you display "I Can" statements in your room, you can pick up this banner as a FREEBIE in my TpT store by clicking HERE.  Be sure to leave me some LOVE if you get it!  :-)
I love the theme of this CLASSROOM DECOR!  This DIY project was easy to put together.  Perfect for any Elementary classroom on any size bulletin board, too!

This is an empty spot on my wall in view of the students, but it wasn't in a spot where I was doing my direct teaching.  Here's what I did:
  1. Stapled some black fabric to the wall.
  2. Stapled some border to cover the edges.
  3. I created a banner on PowerPoint with my classroom colors.  Holes were punched in the corners, strung with skinny ribbon, and tied pretty ribbon to the edges.
  4. I hung 6 prepared frames on the wall.  Behind each bow are two tiny flat thumbtacks on each side of the bow.  The frames stayed in place through lots of erasing all year!
It was really simple to create the frames, too.  After purchasing the $1 frames, I went to Hobby Lobby and found some 12x12 scrapbook paper that also went with my classroom theme.  I chose the 12x12 because it would fit in my frame no matter which direction I hung the frame.
I love the theme of this CLASSROOM DECOR!  This DIY project was easy to put together.  Perfect for any Elementary classroom on any size bulletin board, too!
I put together a border and title page on the computer.  Printed and cut them out.  Then glued it to the scrapbook paper.

After putting the paper in the frame, I stapled two pieces of ribbon (in two different directions on each side for extra support) to the cardboard backing of the frame.  Then I put the frame back together!
I love the theme of this CLASSROOM DECOR!  This DIY project was easy to put together.  Perfect for any Elementary classroom on any size bulletin board, too!
And there you have it!  An erasable spot in your room and NOT using the space you have left on your white board.  Cheap, too!! $6 for the frames, scrapbook paper on sale was about $1.50, and yard of fabric.  Not bad!

My next MMI is my very first cohesive classroom set with my classroom colors.  I've put together a hodge-podge of things for my room over time but nothing like this.  I've really fallen in love with the chalkboard look, but I didn't want it all over my room.  Just in POPS! So, I created a set of labels in white & chalkboard to work on this summer.  I made them editable so that I don't have to worry about saving or messing up my originals.  I'm ready to get busy creating a new look for my classroom library this summer using these, redoing my cubby numbers (I don't do names), printing my own desk plates, making more banner titles for my bulletin boards, etc.  It took me FOREVER to figure out how to do this editable without Adobe Pro, but I love the challenge in learning new things on the computer!  My daughter says that I'm Cra-Cra!


My Word Wall needed to be updated, so I coordinated that with my "I Can" banner that I had already made.  I use black fabric, blue fabric, and green fabric in my room for all displays.  Mostly black though.  It's just crisp and clean.


Funny how when you get started, you just keep rolling!! I've been using a really cute free Behavior clip chart, but it wasn't REALLY in my colors. So............ I updated that, too!!!

I did an update to one of my old calendar sets to make it cohesive with these papers, and I'm really pleased with that.  

I'm trying to store all of my task cards with some sort of rhyme and reason, so I created these labels for them.  The containers were only 88 cents at Walmart, too!  I think I could have just kept going and going, but I decided to call it quits!

 I can't tell you what a labor of love this was!!!  I spend so much time in my classroom, that I want to walk in each day and feel happy.  I know it's silly, but I do.  I appreciate so much when my parents come in and say how much they love walking in.  They know that I've created a setting for  learning but with a bit of personality.
Let's face it, ladies.   Our hubbies would never let us have a Frog, Wild West, Sports (well.....maybe) themed room in our homes, right?  This is the one room where WE'RE the BOSS!!  If these are your colors, check out this set in my TpT store by clicking HERE.  I hope that you'll "FOLLOW ME" on TpT to see other Freebies and new stuff I put together!

I'm headed to south Georgia to go to the beach this week!  Fingers crossed for good weather!!  Of course, a bad day at the beach is STILL better than good weather at home!

Have a great week y'all! 


7

Literature Circles Organization

Quick Background:

It has really been a struggle to meld what my heart says about reading with what I am required to do with reading.  We’ve used Reading Street for a very long time, but we have just implemented the CC version in the last two years.  The biggest change….weekly tests cover a new passage.  I do like this as it assesses the ability to apply the skills rather than regurgitate a story that we’ve spent days on….actually memorizing it.  But that’s not what readers do.

Enter Daily 5 into the mix.  One of my teaching partners and I read the books, Daily 5 and CAFÉ, and we both wanted to implement these with the Reading Street.  It’s been a struggle finding the balance.  We start strong, building stamina, using the required skills as part of D5, then at some point, it dwindles.  This was my second years of trying to implement D5, and I was more successful this year overall.  I can really see Literature Circles being the perfect compliment to D5.

Enter Literature Circles.  I’ve read about them and new I wanted to try it.  But it’s kind of like reading baby books.  You can’t really know what works until you HAVE the baby.  So, look back to my page where I created a log for my kids HERE


So, we’ve been at it for about two weeks, and I am loving it!  I am learning a lot from my students by observing their patterns, too.

This is how I’m handling it for now:
I found a great freebie from Creekside Teacher Tales that really helped me get started when I really didn’t know what I needed. 

You can read her entry HERE 
I really loved how the sweet pond animals "went" with all the frogs in my room.

First step was to provide several books to choose from.  I wasn’t really concerned if the books were in their level right now.  I wanted them to experience enjoying a book together.  I might not do this at the beginning of the year.  They wrote their name, 1st and 2nd choices on a sticky note, and put it in a bin.  After going through the lists, I was almost able to accommodate everyone’s first choices. 

Next, I stapled my groups together and announced the groups. 

Using Creekside’s group label, I displayed the group with a cute little pond animal.  Works great for my Frog room, don’t you think???  

I passed out the books and their Literature Circle booklet.  Using some of her smaller labels, I labeled some Target Dollar Spot magazine racks I had stashed away as the spot to keep their books outside of our Lit Circle time.


I met with each group, helped them divide the book into 5 sections (so everyone gets a job in the groups of 5), helped assign the first task and when to meet next.  I fully expect them to finish at different times.  I’m totally okay with that.  I don’t want to stretch the experience to a predetermined timeline.

Then, I cut them loose!  We just finished our second round of meetings (one group of 2 just read the whole book and completed the booklet by themselves.  That worked better for those speedy readers).

I haven’t let them meet on their own yet.  I meet with the groups to help them conduct their meetings.  I’m not completely letting them go, but we are establishing a routine.

1. Start with the Summarizer.  This person writes a synopsis of what has happened since the last meeting.  People can add verbally anything they think is important. 

2. Illustrator shares next.  He/she explains the moment from those pages that was chosen to illustrate and why.

3. Character Captain discusses the characters: anyone new to the story, the main character to see how they are feeling or if our opinion has changed about them.  Lost of talk here!  Kids are free to bring up another character, too.

4. Word Wizard shares their interesting or difficult words.  A few kids haven’t actually looked up their words yet, so we use the context of the story to help us figure it out together.  The kids give their ideas!  Score!

5. Director asks some planned questions and kids chime in with responses.  Director then coordinates the next set of jobs. 

So far, these are my “loves”:

1. Word Wizard is their favorite job!  They like it so much that we decided that everyone can be a Word Wizard (even if it isn’t their job for the session).  The WW will lead the talk, but they can ask if anyone else found any interesting or difficult words.  They are hunting for them like you would not believe!  Love it!

2. Character Captain is kind of hard for them at this point, and I am glad.  Glad because I have the chance to help pull out better words from them.  “Nice” is such a weak word, but they resort to it frequently.  By talking with the group and listening to each other, they are citing moments in the text to help find better words.  I can see progress!
****Bonus Love-One of my students was the Character Captain first and then moved to another job.  During the second meeting, he kept talking about the characters.  He discovered that focusing on that one aspect for a period of time really created a habit! Yeah!

I   3. I am so impressed with the questions my Directors have come up with.  Some are coming up with surface level questions-the kind you’d get on an AR Test.  Some are really using deeper questions.  They are predicting, reflecting about moments in the story, and feelings about characters.  Great dialogue from each other.  I am hearing great responses, and they spur each on more that I could!

    4. The Talk.  I love the talk.  I hear kids making connections to characters from other stories, they are making connections to things that have happened to them, etc.  I will never know this about their reading from an AR test or from the summary they write for Book Camp.  This is the missing piece to the puzzle.  AR is a great tool.  Their genre summaries are great, too.  We are doing great things, but I have felt in my gut for a long time that there was more.  It’s like closing the triangle.

Where are my goals at this point?


1. I’m still observing a lot, making it up as I go, at times.


2. Create a bookmark for the kids.  (Ahem….UPDATE…I’ve already done it, and you can get it in my freebie if you download it again.)  Some of the less organized kids lost track of their “jobs”.  A bookmark should help them keep focused as to the job at hand.

  3. I’m going to put together some “Question Sticks”.  I see
 these on TPT and talked about in blogs.  I think these will make a great closer or when the Director needs some help finding good questions.  When they HEAR good questions, I think it will spur them to CREATE their own good questions.

4. Add to my booklet.  I want more jobs!  Thinking of creating more jobs and letting the group pick the 5 or 4 jobs they want.  My teammate would really like to me to design some booklets that are oriented to the genre.  Like, if it is historical fiction, there should be a job where they describe the setting, compare with modern times, etc.  If its non-fiction, provide areas to log in facts learned, etc.


I’m super-energized!  I will definitely be putting together more things this summer.  Hoping to put together a great packet so you can Print and Go!
0

Using Literature Circles Booklets (+Freebie!)


I've read about them, talked with teachers who love doing them (older kids though), but I haven't taken the leap to TRY them.  I've been reading The Book Whisperer, and I love so much of what she has to say.  I love the joy she gets from reading.  I was certainly the Reluctant Reader as a kid.  I was a good reader, great vocabulary, but I never FINISHED books.  Encyclopedia Brown was my best friend.  I could read half of the book and return in on "library day" feeling satisfied that I had read most of it with no urge to finish.  How SAD is that!  I truly did not enjoy reading until college.  Summers were spent at the used book store buying all of the Flowers in the Attic series and devouring them.  Not literature, for sure, but I enjoyed the escape and the freedom to read what I wanted for a change!

Since beginning the Book Whisperer, I grew to appreciate the talks that I often have with my kids when they read a book or are trying to find a book.  What was missing was the dialogue they could have with each other.  Back to that voice in the back of my head that wanted to try Lit Circles with my kids.  I have an amazing group of readers this year.  We are focusing school-wide to broaden our genre reading which has really lent itself to the talks I've had with my kids.

I knew before we tried Lit Circles, I had to choose a read-aloud that was more than funny or entertaining.  I went with The Miraculous Journey of Edward Toulane.  Wow.....
What a great read!  I sat at my desk reading aloud with tears coming down my face, my voice quivering, and a silent classroom hanging on every word.  We had wonderful class talks about Edward.  Great book to see a character change.  I highly recommend and will read this book much earlier in the year next year!

After these book talks, I am ready to cut them loose to talk with each other.  I don't know how this will go.  I'm making it up as I go along.  We'll learn this together, but I have to try it out before I can improve it!  Promise to keep you posted on our progress...hopefully!

I teetered back and forth on how I wanted them to document their roles and decided on personal logbooks.  That way, they have their own keepsake of their journey.  I'm putting my attempt on TPT as a Freebie.  I'd love for you to try it out and give me your feedback!  I'd love it if you would Pretty Please follow my TPT store in return.  I'd love to share future updates to the packet with you, and let you know when I make other items that might work for you!

Here is the simple way I decided to put these together without the kids pulling out their scissors.

Step One:
Made 12 sets that were collated on the copier


Step Two:
Stapled the upper edge for each booklet


Step Three:
Trimmed the outer sides

Step Four:
Cut the two booklets along the center line

Step Five:
Done!


Bonus:
Added a few extra pages for the Summarizer in case they need more than one page.  I put that page in the back of the booklet....just in case.


And..........Finally!!!
None of these on the floor!  Yeah!

Click on the image below to grab your OWN copy!  Let me know if you LOVE it!


3