

How many of you use MLK’s
birthday as an unofficial kick-off to Black History month? I decided to this year with this AWESOME
Interactive Notebook by Jamie at Diary of a Not So Wimpy Teacher!

I LOVE doing Interactive
Notebooks with my kids, but I don’t have one for Social Studies. I decided that since this product has SO many
great pages to use, it would be perfect as a stand-alone project that will be a
great keepsake. Let me just say…I really
like having a big unit to work on. Makes
prep super-easy, and the kids know what to expect, what materials are needed,
and you can get down to business!!! Time
is so precious!

We started by decorating and
gluing the cover to one side of a 12 x 18 sheet of construction paper. We ran these through the laminator to keep
these durable during the month of heavy use.
If you ARE using the traditional composition notebook, each of these pages, close read passages, and foldables ALL fit PERFECTLY- so there are no worries about reducing the size of the page to fit!
If you ARE using the traditional composition notebook, each of these pages, close read passages, and foldables ALL fit PERFECTLY- so there are no worries about reducing the size of the page to fit!

Next, I took some 12 x 18
drawing paper that I have in bulk. I
counted out the pages I plan to use, added a few more…you know we tend to get
inspired and do something EXTRA…and trimmed off an inch. I know when I fold it, some of the paper will
sneak out of the sides if it isn’t a little smaller.
Yeah…a little OCD there.

I PLANNED to use my new Quirky stapler to create a booklet NOW, but I decided to keep the pages tucked in for now. I think I'll wait until there aren't any mess ups and "page re-dos". Now, this whole thing could be done so easily with a file
folder or just simply stapling the outer edge, but I really want to try out
this new gadget. I'll keep you posted!
Now that the prep is done, we dug into the first page for our long-term
project.
Using the open-ended Table of
Contents page, we label the page number and Black History Month. This is a great way to keep the notebook organized and a tool to refer to for other activities you may do throughout the month.

Before we look at the first page we completed, let me share an INB tip with you!! Precut...Precut...Precut!!! Don't be intimidated that this will be a messy process if you've been scared to give it a try!

As you can see, I pre-cut the pages on my paper cutter. It takes a VERY short time for me to cut them for everyone, and our lessons can be focused on the learning. There are times when I want them to have a little chat time- cut a little, glue a little, chat. Science and Social Studies are often the subjects that get bumped a bit, so I need to MAXIMIZE the time we have. Ten minutes of cutting ALL these pages saves so much MORE in the classroom! Trust me!
 Now.....to get into how amazing this product is going to be in my classroom!! Each of the pages are set up to be a TWO page spread!
On the left, you have a close read. They are super informative! What I love is that at the bottom, there are two questions for the kids to refer to the text to answer.


 There are SO many different styles that your kids will love the variety! I took a quick screenshot from Jamie's preview to show you how some of the other pages will turn out!

Before we look at the first page we completed, let me share an INB tip with you!! Precut...Precut...Precut!!! Don't be intimidated that this will be a messy process if you've been scared to give it a try!
As you can see, I pre-cut the pages on my paper cutter. It takes a VERY short time for me to cut them for everyone, and our lessons can be focused on the learning. There are times when I want them to have a little chat time- cut a little, glue a little, chat. Science and Social Studies are often the subjects that get bumped a bit, so I need to MAXIMIZE the time we have. Ten minutes of cutting ALL these pages saves so much MORE in the classroom! Trust me!
On the left, you have a close read. They are super informative! What I love is that at the bottom, there are two questions for the kids to refer to the text to answer.
I can really see using the Close Read in my small groups, too! Nothing like double-dipping in your day! And get this.....there are TWELVE passages paired with its own unique foldable! I will probably choose about six, but that is totally up to you. Better to have too MANY choices than too FEW, right?
The right side of every section comes with the part the kids love...shhh, so do I.....the FLAPS!! On this particular page, there were some additional questions to answer from the text.
I missed taking a picture of this one, but I love the Venn Diagrams she includes. In third grade, we are always looking for opportunities to compare and contrast in our reading...ESPECIALLY from two DIFFERENT passages! Well, you are all set with this one! I am planning to use the provided diagram to compare/contrast Fredrick Douglass and Harriet Tubman. You might want to use ALL or a few! Again, these extras will really help tie your Social Studies standards into your reading block AND your writing block!
We keep baskets at the end of our tables (teacher talk for 4 desks put together!). I love keeping our on-going projects OUT of their desks but CLOSE enough to access quickly.

You are in for a treat, y'all! Jamie is sharing a special sampler just for YOU! Aren't the jars super cute?? Great spot for your kidlets to find and cite facts found in the text. Great spring board to write summaries, huh?


I just KNOW you're gonna want the whole package, so I'm including the link straight to her store to snatch this up in time for your February lesson plans!


We keep baskets at the end of our tables (teacher talk for 4 desks put together!). I love keeping our on-going projects OUT of their desks but CLOSE enough to access quickly.
You are in for a treat, y'all! Jamie is sharing a special sampler just for YOU! Aren't the jars super cute?? Great spot for your kidlets to find and cite facts found in the text. Great spring board to write summaries, huh?
Click the image for the direct download! Sweet!
I just KNOW you're gonna want the whole package, so I'm including the link straight to her store to snatch this up in time for your February lesson plans!
Hope you enjoyed my review! And what do you think Jamie's grade should be, huh?? I think she gets a big fat A! (Or a 4 in my standards-based land, where 4's go above and beyond requirements!)
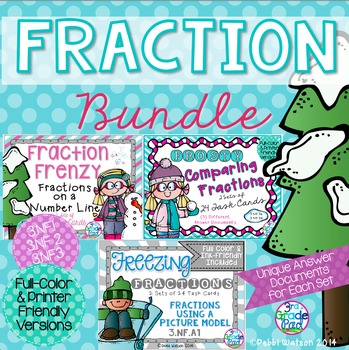
Be sure to check out all the other bloggers below and see MORE reviews! Be sure to see Jamie's review at her blog, Diary of a Not So Wimpy Teacher, and read about my Winter Fraction bundle! Yikes.....I hope she liked it!


Thanks for the super sweet review, Debbi! I absolutely love how you laminated your homemade books! And of course I adored your fraction task cards!
ReplyDelete