Showing posts with label Classroom Management. Show all posts

Managing Guided Math Rotations

Making the switch to doing my "Core Teaching" in small groups has been one of the biggest game changers in my classroom!  It definitely didn't happen overnight.  It took one baby step at a time to get to where I am now, and I couldn't be more excited to share what's working in my classroom
title image here

Why I Made the Switch

Studies show that whole group instruction does not reach all of your learners.  Chances are, the students who are less engaged are the ones who need engagement the most!

How I Implement My Small Groups

Whether I have 3 or 4 small groups, I have a 4 Rotation System that works for me.

These four areas are specific enough that my kids have a definite idea of the expectation.  However, it is also broad enough that some of the area could be switched up from time to time and STILL be covering content in a way that I prefer.


M could stand for anything you need!  Math Facts, Math Journals, Math Games, Math...whatever!
For me, M stands for Math with the Teacher.  This is my small group time.  This is the first step in planning my lessons.  I have found over time that starting with my my "on-level" kids works best.  Why?  For the most part, these students are most likely to grab onto the lesson.  They are also the safest group to do the practice lesson.  Because they are less likely to struggle, I can gauge how parts of the lesson are going before I teach it to future groups.  Additionally, if I have a student who is still struggling, I will keep them for an additional rotation to get an extra "dip" of instruction.

I will usually work with my below-level students next.  I don't want to be rushed with this group.  Every minute counts.  I have already identified areas of my lesson that may need to be improved, or identified a change in the pace, so this lesson should be perfect!  Students who may have stayed on for additional instruction are free to leave once they get it or will be combining two of their future rotations together.

I usually end with my above level kids.  Depending on where we are in the scope of the skill, I may be teaching an enrichment lesson.  With my second graders ,for example,  we may be covering arrays to 5 groups of 5.  My above level friends might be ready for higher arrays or introducing them to multiplication.

This letter is ideal to designate for the Application of the math learned.  I also like for my students to apply what we've learned right after leaving my table.  I call this "At Your Seat Activity", but it could be called Applying Math or Application of Skills, depending on the age level of your students.  I will often use this rotation to complete Independent Practice from our math series or to complete a Math Journal activity with our target skill.  

Problem with early finishers?  I tackle this by permitting my students to begin the NEXT rotation once they have completed the assignment.  Not finished?  They can't begin the next rotation until it is COMPLETE.  The A & T rotations work really well to be combined (for three rotations).


I teach in a digital 1:1 district, so I  have one rotation dedicated to using technology.  This is also perfect for classrooms that have limited access to technology.  If you are using shared devices, using a device for QR code task cards is a great way to use technology!  Parents are often very helpful in donating old smart phones to use QR codes.  I love using websites like IXL,  Xtra Math, Moby Max, and Scootpad.  It is easy to differentiate by each rotation, too!


My favorite rotation HAS to be the opportunity to push forward interesting games, task cards,  and such to reinforce old skills, practice new skills, and provide enrichment opportunities.  H means Hands-On  Activities in my classroom.  Student have the opportunities to leave their seats and have choices of working independently or with a partner.  Children need repeated opportunities to have choices with concrete experiences.  I feel we pull back on concrete experiences too quickly, but they really need repeated exposure.  Problem solving with peers is so beneficial, too.

Small Group Management

I use simple, "timed" PowerPoints to manage my rotations. To prepare each week or day, I use a simple planning sheet to track my overall needs for the day.  It makes it pretty simple to use the sheet to fill in my PowerPoints.   I really try to set up Weekly contracts for some rotations so that I only need to update my small group or independent activities each day.

If I know that I will only have 45 minutes for rotations, I simply divide up the time into even increments, and change that one little setting on the rotations. 

Bam!  I never have to leave my small group table.  

I add the "chimes" signal for my "Clean Up".  We practice this A LOT at the beginning of the year.  In fact, I teach the HOW of small group clean up, rotating, etc. by teaching review skills in groups to begin with.  I will teach games that will go into the centers later and permit them to play at my table.  This permits me to leave the table and monitor the other groups.  

Once we've got the HOW mastered, the content can get deeper without fear of interruptions or improper behaviors.  If you'd like to take a peek at my Math Rotations slides, click HERE to see all the options for your own classroom.  Knowing that not everyone's classroom may work as mine, does, I created some options to cater to any classroom's needs.


1

Differentiate Centers Using Simple Color Coding

Reinforcing skills over time is such an important element in any classroom.  

The struggle: How to reinforce the skills across the classroom without reinventing the wheel each week.  I've come up with a system in my centers that has made it so simple!  


Part One: Setting Up a Color Coding System


Step One: One Skill in One Place
When I determine a skill to practice, I want my students to go to one place.  Inside that one place, I will provide the differentiation that is needed.  If my students need on-level and above level practice, I will have color-coded activities just for them.  I recommend you build any center with this idea in mind.  In math, I try to have five centers going to choose from.  Most will be differentiated with different choices inside.  Perhaps not EVERY center, but nearly every center will be differentiated.   I love using these Sterlite bins for SO many reasons in my classroom!  These are super sturdy, stackable, and easy to label.  I buy mine at Dollar General mostly, but Target will often have a different color on the handle that I like to buy, too.  If you don't have these stores, buying them in bulk is a great option with Amazon Prime.  


Step Two: How to Prep Differentiation
To set up the assignments for the students, you will need to choose a consistent color scheme.  The first three colors you choose may depend on some systems you already have in place.  


I want to be fair in saying that I determine the level based on year-end grade level expectations.  At any given point in the school year,  below-level activities might be the appropriate choice...and that is okay!  My students are not labeled-the activities are.  My fourth color will be for everyone-my generic color.  If I have an activity that is not differentiated, I code it pink.  Pink is just a color that works well in my room and I always have tons of pink paper!  My kids know right away that if there are pink cards or a pink bin, they don't need to find a certain color. 

Step 3: Differentiate Using Existing Activities
If you have been collecting centers and task cards for any amount of time, you need just a few simple tricks to push them out to your students.  I use a combination of these all the time!

I love these Target brand sandwich bags to put my task cards in.  They are already blue, yellow, green and red (but they look pink!).  It is so simple to just drop in what I need for each group.

No colored baggies?  No problem!  Use any task card holder and drop a sticky note or colored index card inside.  You can even add specific directions on the card.  Simply discard the directions or save them for future us.


Step Four: Prepping New Activities
With my system already in place, I may decide to use colored paper to copy the activity or task cards based on how it meets the standards I am addressing.  For example, as a 2nd grade teacher, I often have children ready to do multiplication activities or 4 digit subtraction.  If they come in an ink-friendly format, I would copy them on blue paper before I laminate.  I've created some task cards for my student-centers and made them Low, On-Level, and High to cover certain math skills so that I can easily differentiate throughout the year.  
You can take a closer look at all of the skills covered in this series by clicking HERE.  


Tune into PART TWO of this blog series when I share some other ways I differentiate and set up my centers!


1

Teacher Tip to Encourage Good Choices


Teachers are busy, but we can't be too busy to notice our sweet friends when they make good choices!
Quick & Easy DIY resource for communication with students.  This tip is perfect for PBIS classrooms.
I wanted to add a quick way to encourage my students, but I wanted to also REMEMBER who I have encouraged!  Who might NEED encouraging!  While walking through the aisle of Dollar Tree, I recalled a cute idea from a blog post I read in the past.  I can NOT for the life of me find it---if you KNOW, please share as I'd love for you to see that post, TOO!  At any rate, seeing the $1 Receipt Book, I knew what my next project would be!  And I am LONG overdue for a Monday Made It!

10

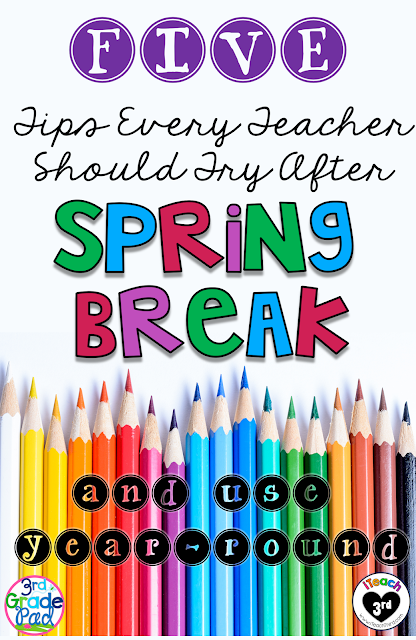
Tips for Teachers After Spring Break

Returning from Spring Break can be the BEST time to add a spark to your classroom routines!  What's more...it is also the perfect time to try out some techniques and routines that you might have been a little nervous to try!  Who better to try them out with than with the students you have already established a trusting environment!
Collection of  five "Must-Do" Activities in the classroom that will get keep student focused in the right way!  The final tip is my favorite!

1

Six Free & Easy Classroom Rewards

Hello friends!  I'm excited to share with you my FAVORITE classroom rewards and WHY I use them!

0

Differentiating Reading Goals in the Classroom


As teachers, we all want to promote lifelong reading.  That's a given.  How we DO that as teachers, grade levels, and schools tends to vary.

3

Classroom Tip for Managing Centers


Hi friends!  So excited to join in The Elementary Entourage’s Annual Tricks & Treats Blog Hop!

 Wanna see my trick from LAST year?  Be sure to click HERE!  I shared how I use Symbaloo in my 1:1 Digital classroom.
My tip is super quick and can be used for ANY center that uses an answer sheet.


I love using centers that are completely open-ended, but I also like for my kidlets to be accountable at times.

Problem: One little Goober will forget that he started a center.take ANOTHER sheetthen, right in the middle of my small group lesson, little Susie can’t do the center because there are no more sheets.

Happens.ALL.The.Time.

My solution is pretty simple.  All you need is:
  • ·      Seasonal stamp or sticker
  • ·      Sharpie


Create a set of answer sheets for every child in your classroom.  Then, put a cute little stamp or sticker in the corner.  You can change it seasonally or to help you differentiate your kidlets!


 Once they are stamped, I number the pages.  This corresponds for the number system I use for all of my kids.  We line up in order, I use a number system to file their weekly papers.  


Yes....keep going until you have enough for every child to complete the center ONCE.  

This cute center in not mine!  This one dates way back and was a free download.  I did a little searching and the author happens to be a fellow blogger.  Be sure to check out Confessions of a Teaching Junkie to see more of her recent stuff!  

Then, you will simply fill your folder, envelope or wherever you store your answer sheets with your center.  Now...all you kids need to do is...
  • Choose THEIR number
  • Work on their center
Not finished? No problem!  Have them return their paper to their spot for NEXT time!  This is super quick to prep--you can even let your sweet friends get these prepped for you!


Now that I’ve tricked you.how about a TREAT!!!

I’ve put together a little Sample to use in your centers this October.  Super easy to use for a small group lesson, center, or RTI for the standard!


I’ve also put all of my Halloween Task Cards on sale until Monday, October 19thrd.  Once midnight hits..POOF!..it’ll be regular price!  Click the image below to see my FREE sample and these items that are all 20% off for this short time!


Now...hop one over to see more great Tricks & Treats!


0

Weekly Communication Using Padlet


Hi friends!  The last few years, our administration has required weekly communication in the form of some sort of newsletter.  As a 3rd grade teacher, I really struggled with this at first—we really felt this was a great time for the line of communication to shift to the student being more in charge. However, in the digital age, it is time to evolve with the needs of our parents.  I’ve tried several things over the last few years. 

  • ·     Weekly emailed letters
  • ·     Weekly homework stapled in a homework book
  • ·     Printed newsletters in weekly signed papers


All are viable forms of communication, but I always wondered if my parents received it!  Add the most recent glitch—our email server blocking all emails from Hotmail---I knew I needed a new solution.

Enter, one of my favorite Web 2.0 tools..PADLET!  I’ve blogged once before about how I use it with my students in my 1:1 digital classroom.  You can read about that HERE if you are interested or need more info on how to set one up.

Padlet has several features for sharing.  I’m sharing with you how to embed the Padlet on your classroom website—creating once.  The result??  Each time  you add a newsletter, homework assignment (whatever you want to share), you will NEVER … wait for it…have to update your website AGAIN!  Here’s how it works in a few simple steps.

I promise you…this is easy!  You do not need to be techy.  Seriously..copy and paste.  PROMISE!
Design your Padlet
I really suggest using the “grid” layout.  Each time you add a padlet to the page, the most recent will automatically rise to the top.  This format also keeps them neatly arranged without any effort


Once inside, copy the text inside the Embed section.


Then ...

Then...
 There it is!  By clicking on "preview", you can see how it would look on your website.  

It is ready for your parents to scroll up and down, select the newsletter to view, and even print.
 On my school-hosted website, which is where I actually have this for my parents, it works a tad different.  I’m still going to find where to place the HTMLand just save it.  Mine looks like this--perhaps your school site is similar.

 On our school site, it isn't quite a pretty as my blog, but it works for our parents to access all of the school information in one spot.

 Hmm....I really need to update my picture!  Hahaha!

Last but not leastfrom now on, all you need to do is add your newsletter, parent letter, or homework to the Padlet.  It automatically updates on your website for you! 

I promised you one and DONE All I do now is send out a quick message on Remind to let parents know it’s there.

Now, there are no worries of the email getting lost in someone's inbox, papers being lost from school to home, and  now provide easy access to all newsletters at any time. 

There are so many possibilities doing it this way!  I hope you’ll give it a shot, friends!


3